Device Overview
Get to know your new RM1 a bit.
Features & Connectors
Front View

| Number | Feature | Description |
|---|---|---|
| 1 | Headphone Connectors 1 & 2 | Connects to headphones. |
| 2 | Status LED (white) | Signals status of RM1. |
| 3 | Multi-Function Push-Buttons | Control dynamic functions as shown on the display. |
| 4 | Integrated multi-touch display | Directly control features of the device. |
| 5 | Multi-Function Encoder & push button | Use the encoder to adjust headphone or speaker volume, input gain or scroll through menus. |
Rear View

| Number | Feature | Description |
|---|---|---|
| 1 | Status LED (green) | Signal status of RM1 |
| 2 | 16ch USB-C Connector & LED | Connect to a computer or mobile device for 16ch In & Out USB audio as well as power delivery. |
| 3 | Stereo USB-C Connector & LED | Connect to a computer or mobile device for Stereo In & Out USB audio as well as power delivery. |
| 4 | Ethernet Connectors | Connect to a Switch or Router. Used to reach WebUI and/or 4x4 Dante Audio over IP. |
| 5 | AUX Connector | Connect to a headphone jack of a smartphone or laptop. Serves as stereo input to RM1 and mono output to the external device. Serves as a Talk / Cleanfeed output, so everything except the AUX input signal is returned. |
| 6 | Speaker / Line Out | Connect two Studio Monitors. Can be automatically muted if a microphone is switched on to prevent feedback. |
| 7 | Microphone Inputs | Connect your microphones. |
| 8 | GPOs (General Purpose Outputs) | Connect to external logical sinks, such as Yellowtec m!ka Mic Arm On Air to power the red / white LED on air indicator or other peripherals. It also acts as a power supply, so no external power source is required. GPO 1 is logically linked to Mic 1 on/off state, GPO 2 is logically linked to Mic 2 on/off state. |
| N/A | Bluetooth Audio | Connect your mobile device to RM1 using Bluetooth. Serves as stereo input to RM1 and mono output to the external device. Serves as a Talk / Cleanfeed output, so everything except the Bluetooth input signal is returned |
High Volume Safety

Protect your hearing from high volume levels. Permanent hearing damage may occur when headphones are used at high volume levels for a prolonged time.
Power Delivery
RM1 receives power through one of the two USB-C ports. RM1 requires at least 15 Watts / 5V3A. This means, through a standard USB-C to USB-A cable, connected to a 5V power supply or a computer/mac, RM1 will not start up. Connect at least to a USB-C or Thunderbolt-Port which supports power delivery.
Maximum USB-C cable length: 2m.
Alternatively, you can connect one of both USB-C ports, to the included USB-C power supply and the other one to your computer / mobile device afterwards for audio I/O.
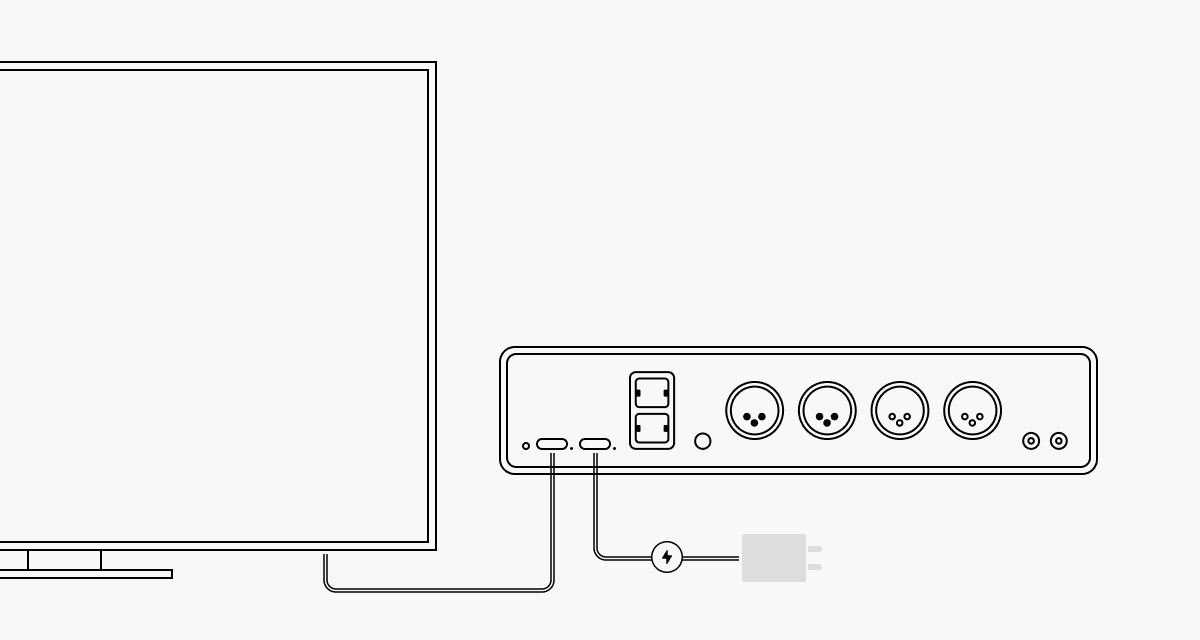
Possible connection options with power and data delivery (examples)

RM1 is connected to a computer for power delivery and audio via USB 1
RM1 is connected to a computer for audio via USB 1 and power delivery via USB 2
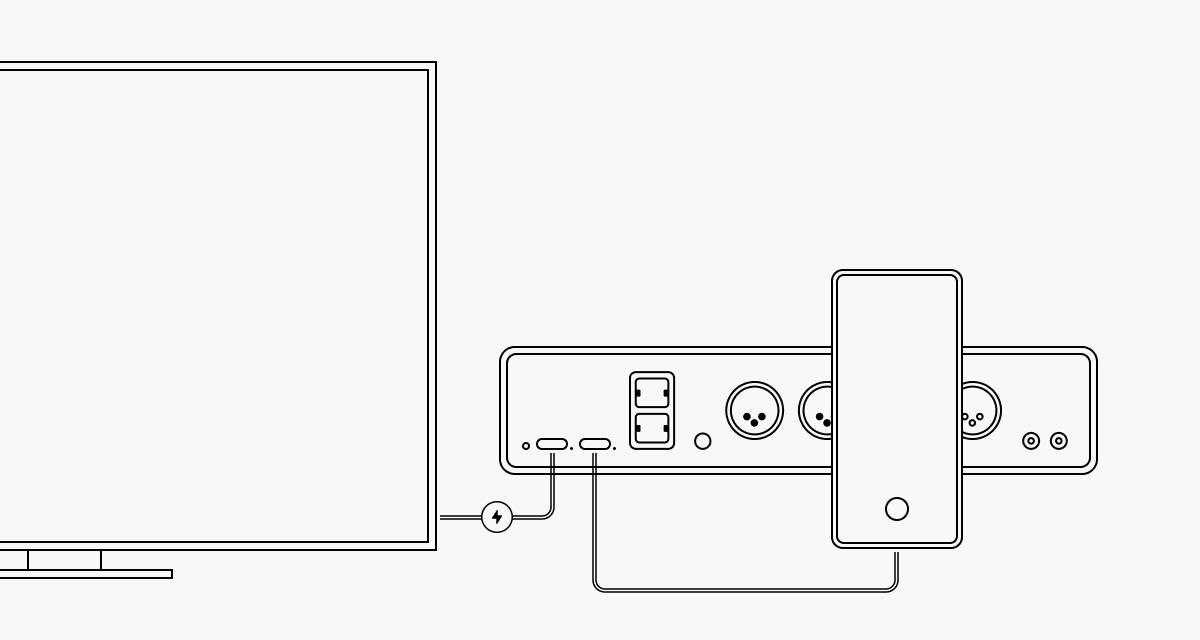
RM1 is connected to a computer for audio and power delivery via USB 1 and to a phone for audio via USB 2
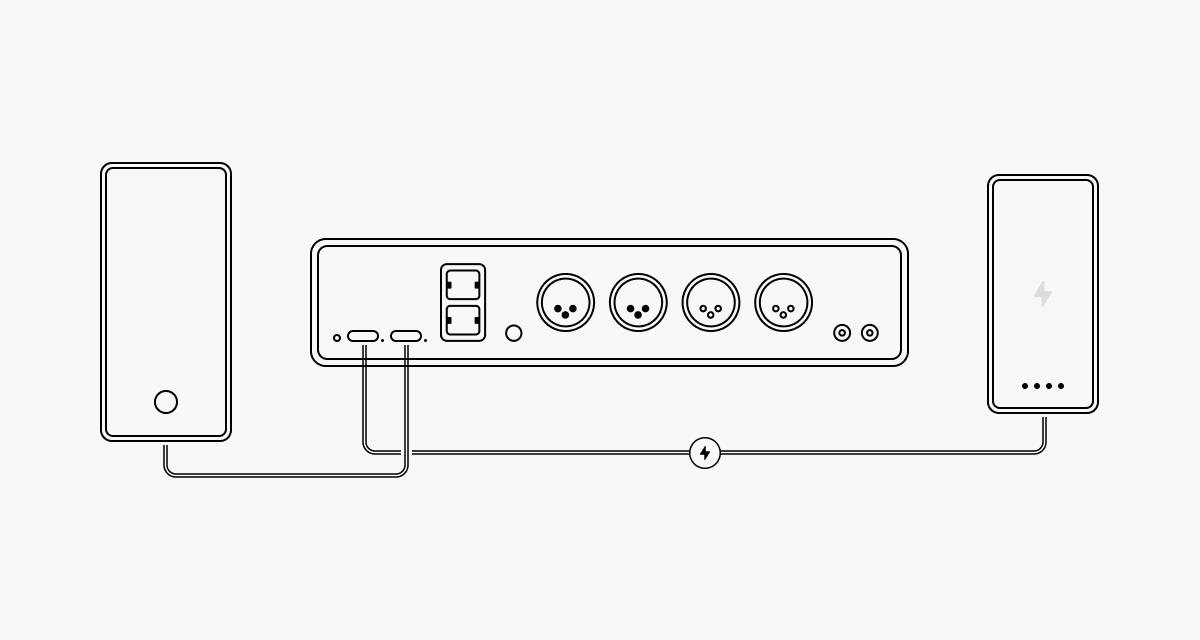
RM1 is connected to a power bank for power delivery via USB 1 and to a phone for audio via USB 2