Understanding the Web UI
RM1 is uniquely controlled through a sophisticated, platform-agnostic web UI. The UI is structured into three main views. Navigate between the views using the Live, Edit, Settings buttons on the top.
Live View
Internally, RM1 acts like a mixing console. Live view displays every available input as a channel with an individual virtual fader. The produced stereo output signal is called Mix.
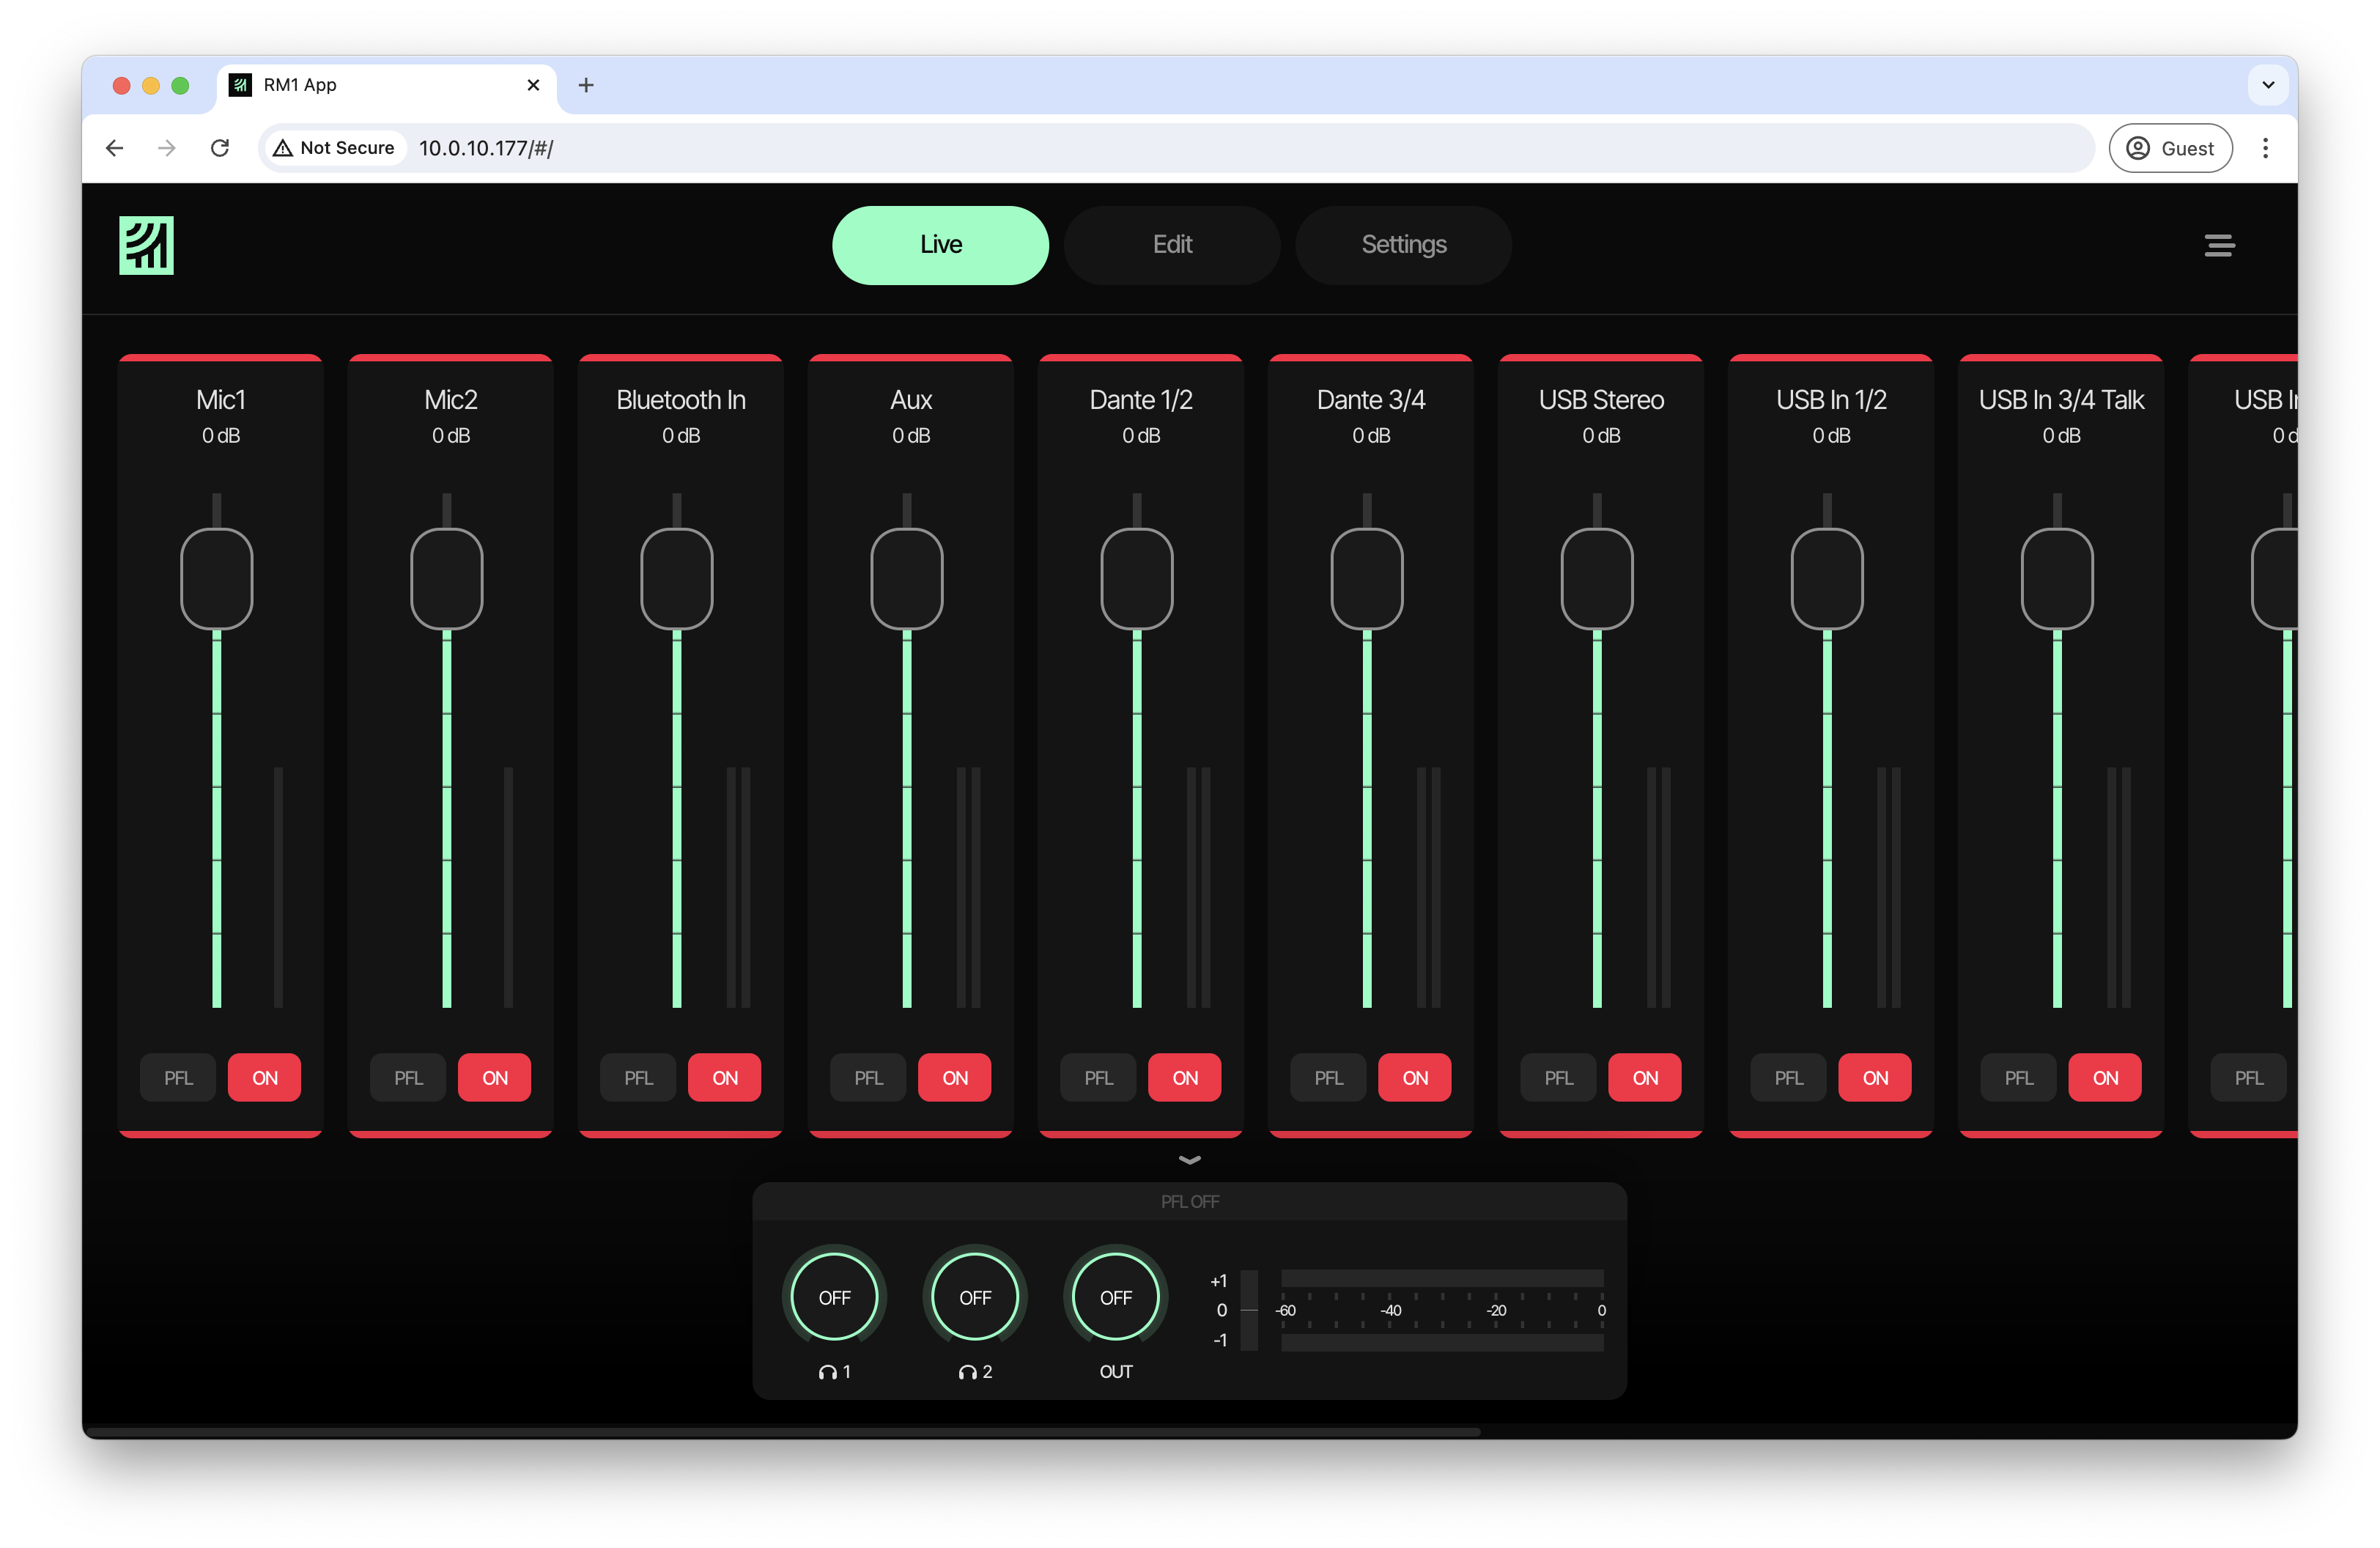
To adjust the volume of a channel in your mix, e.g. for background music, simply drag and move the fader. The new volume will be shown in dB above the fader.
To disable an input completely on your mix, press ON below the fader. To re-enable it, press the Button again.
To pre-listen to an input without having it on your mix, press PFL below the fader. The output on your headphones & speakers will now be replaced by the PFL signal. What you hear is the input signal after processing (EQ, comrpessor etc.), but before the fader value is applied. That means you can even listen to muted inputs.
Use PFL for preparing new inputs or phone talks, or to adjust processing of a specific input on the fly while recording or streaming
To quickly access the edit view for a specific input, tap the input name on top of the fader.
Edit View
RM1 features broadcast-quality on-board processing, engineered by DHD audio. To control the processing, enter edit view.

Here, you can control every attribute of all audio plugins within the processing chain. See Using the Internal Audio processing for a description of each plugin displayed here.
Select a Input
To select the input you want to edit, select it from the list of inputs displayed on the top of the page.
Enable, Disable & Reset Plugins
To enable each plugin, tap its ON/OFF toggle. Now, use the individual sliders to adjust the audio values. Use the reset button alongside the ON/OFF toggle to reset the plugin to factory defaults.
Rename Inputs
To rename an input, tap the pencil icon next to its name in the first section of the page. Here, you can also reset the input name to factory default.
Working with Channel Presets
To load a channel preset, click Select Preset in the first section of the page. A list of available channel presets will open. Select the channel preset you wish to load and click Load Preset
RM1 comes with ready-to-use microphone presets, covering the most common microphones used in podcasting and broadcasting. These presets are tailor made for podcasting and live streaming at a broadcast quality level.
If your microphone is not listed or you are unsure, use the generic presets, made to be a good fit for almost any kind of microphone.
To save you current setup as a preset, click the + button next to Select Preset. Enter a preset name and click Save Preset.
You can also upload and download mixer presets to share them with other RM1 users or simply archive them. Use the Upload and Download buttons in the select preset list to do so.
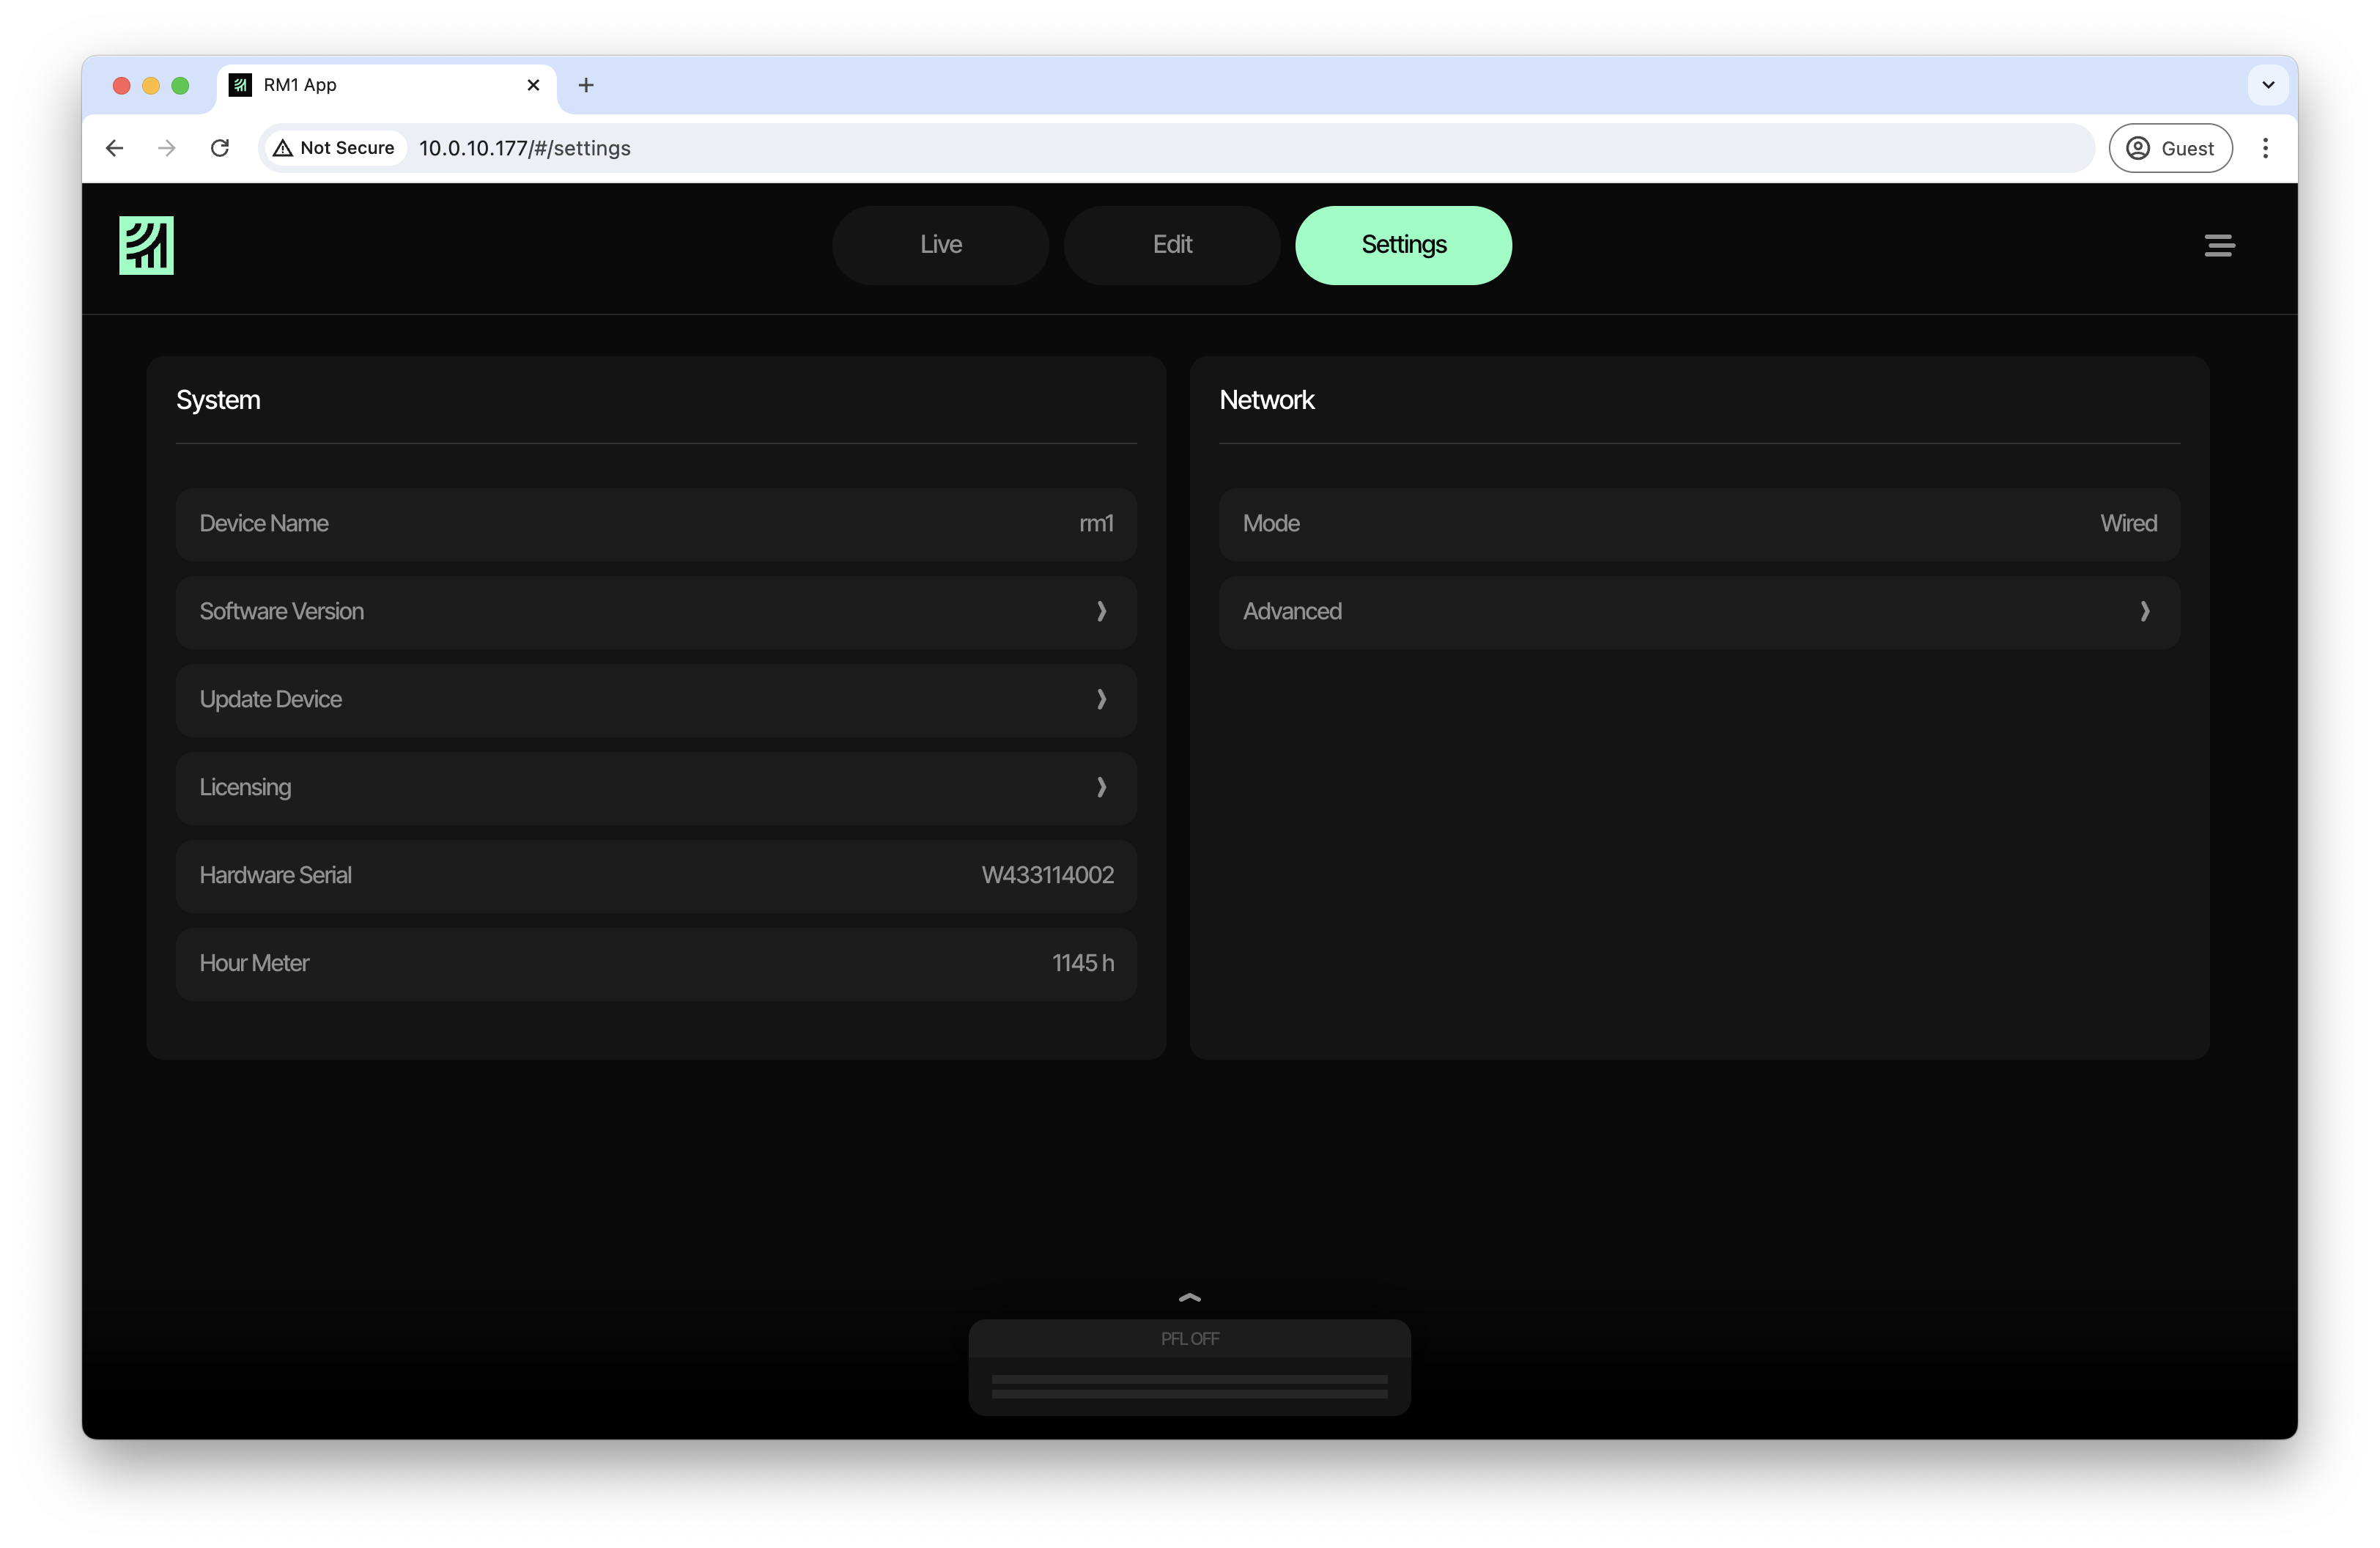
Settings
Settings page allows you to rename your device, see and update RM1 firmware or edit network configuration.
Output Section
At the bottom of each view, there is an output section available. It indicates, if there is signal present on the output. If PFL ON is displayed and green, PFL is enabled, which means that the output of the device is not concurrent with what you hear on your headphones and speakers.
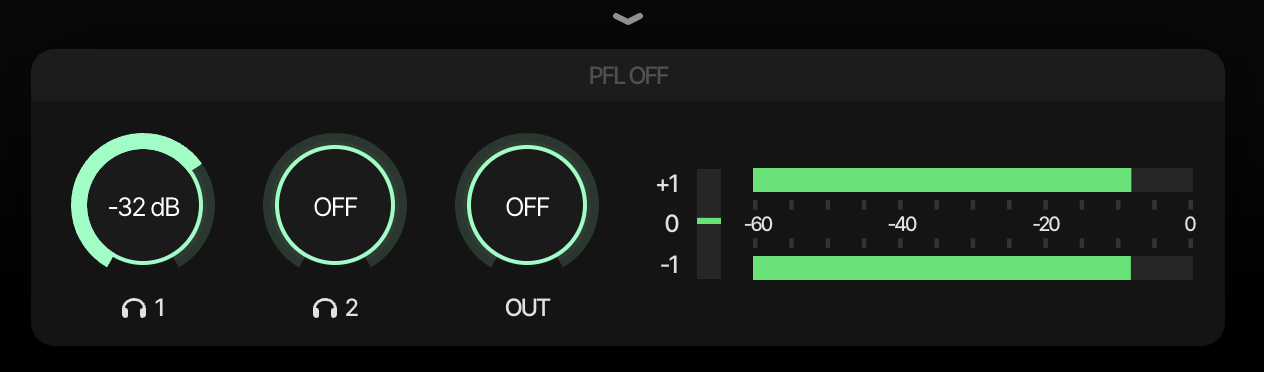
If expanded, you can also adjust headphone and speaker (OUT) volume here. Tap the arrow above the section to collapse it. It will shrink and only show the PPM.